How To Overcome The Objection – I Want To Think About It

I guarantee one of your worst feared objections is “I want to think about it” isn’t it?

Why do all salespeople fear the “I want to think about it” objection?

Because it isn’t really an objection is it? Or is it? They haven’t really said “No” have they? They haven’t really said “Yes” either have they? So the weak sales rep can breathe a sigh of relief and believe the client will definitely get back to them with a yes tomorrow and the so-called experienced rep will make the excuse that it wasn’t really an objection so there was nothing they could have done to overcome it. While the Professional Closer goes to work and starts to find out exactly what it is the clients want to think about. Whichever one you are, let’s look at this “objection” in the latter sense, as Professional Closers; after all, if you didn’t want to become a Professional Closer you wouldn’t be reading this, would you? So what can you do in this situation?

Firstly we have to look at the reasons why people say “We want to think about it”

The first and most common reason you will get the: “I want to think about it” objection is that you gave them too much information to think about! An old sales trainer and excellent motivator of mine were always saying “If the cow doesn’t moo, don’t feed it” What he was saying in an essence was, only give them the information they ask for. There is no point in telling them how efficient the air conditioning is on this particular model of the car if they live somewhere where it snows for 6 months a year. They will be more sold on the amazing traction the electronic 4X4 system gives them when driving on snow and the fact that by pointing the key through the kitchen window and pressing a button while they’re finishing their morning coffee, the seats heat up and the all windows de-mist automatically.

Do you get the idea? You can always add the air conditioning in as an additional benefit for when they drive down south for their summer holidays while they’re signing the purchase agreement. The other main and obvious reason you will get “I want to think about it” is you haven’t sold them yet.

At this point, you need to revert to A.C.O. (See: Overcome any objection with This tried and tested three-step formulaAgree with them: “I fully understand John and Mary, if I was in your shoes I’d want to think about the payment options and whether I could afford the additional monthly outgoing.” Confirm: “Is that what you want to think about?” If that is not their reason you need to keep asking with one option at a time until you have isolated it down to the real objection.

Now you just get back into Overcoming the real objection and closing the deal!

So to recap: “I want to think about it” really means, you’ve given me too much information and I’m confused. Or, I don’t have enough of the relevant information so I’m not sold yet.

By keeping it simple and only feeding the cow when it moo’s, you will always be dealing with: “I don’t have enough information yet” It’s always easier to add the benefits of your product bit by bit than take something away once you’ve given them everything upfront.

The lesson this week is: “Don’t feed the cow till it moos!”

It can be a fairly complex process but don’t feel overwhelmed, reach out to PrintArt today, and explain your needs.  Their customer service department will put together a cost-effective quote and help your vision come to reality!


PrintArt – Accurate Die Cutting
413 Interchange St.
McKinney, TX 75071
972.562.7921
https://www.printart-adc.com


Would you like more information?
Do you have a special project that you need our help with? Just fill out this small form and let one of our representatives give you a call and talk about your project.

Die Cutting Services: Definition and Applications

If you take a look around, you would know at once that almost all the objects including the tables, chairs, electronics, plastic containers, rubber mats, and fiberboard, etc. are in perfect shape in accordance with their applications. Have you ever wondered how this level of precision in the form of design and pattern is acquired? This process has a very important role to play in this. Apart from materials that we use on a regular basis such as cell phones, plastic cases, and other miscellaneous accessories made of rubber, plastic, glass, etc., these methods also provide proper shape to several high-tech products and industrial components.

What is Die Cutting and how is it done?

It can be defined as a manufacturing process that uses die or specially shaped blades that are bent into the desired shape according to the application. This is required in order to cut materials such as wood, metal, plastic, rubber, fabric, glass, and other materials with precision. The process aims at providing favorable and enticing shapes and designs to the finished products and objects before being sold to the market. On the other hand, several of these products and items are assembled together through a series of steps, which would finally create a finished product.

Besides, in many other cases, machines or devices require to undergo die-cutting before being used further in the process of manufacturing the end product. Hence, several important machined parts and industrial components are die-cut to suit the applicable purposes for which they are produced.

What are various applications and what are the industries served by it?

Reliable and successful service providers are aware of the increasing demands of several industries for precision-cut and accurately-designed parts and accessories for different industrial applications. Hence, they make sure to cater to their clients’ needs accordingly by providing efficient services. Industries related to electronics, appliances, telecommunications, automotive, electrical, and construction constantly require precisely die-cut materials and parts. Die-cutting services hence are used in the following areas of application:

  • Abrasives
  • Carpets and Flooring
  • Cork and Disposables
  • Automotive Parts
  • Felt
  • Metals
  • Envelops
  • Clothing and Fabric
  • Electronics, LCDs, Mobile Phone Coverings and Accessories
  • Foam and Sponge
  • Filters
  • Decorative
  • Footwear Components
  • Furniture and Seating
  • Gasket, Seals and Washers
  • Insulation
  • Pipes and Tubes
  • Leather and Rubber
  • Medical products
  • Laminates and Composites
  • Plastic Cards/Credit Cards
  • Textiles
  • Tapes
  • Paper and Card
  • Packaging
  • UPVC Doors and Panels
  • Protective Clothing, and so on

It can be a fairly complex process but don’t feel overwhelmed, reach out to PrintArt today, and explain your needs.  Their customer service department will put together a cost-effective quote and help your vision come to reality!


PrintArt – Accurate Die Cutting
413 Interchange St.
McKinney, TX 75071
972.562.7921
https://www.printart-adc.com


Would you like more information?
Do you have a special project that you need our help with? Just fill out this small form and let one of our representatives give you a call and talk about your project.

The Essential Guide To Wooden Flooring

Timber flooring can strike just the right note in any style of home – it looks natural, warm and rustic in a country cottage and, in a contemporary setting, it can add texture and create an organic feel. Moreover, in both modern and period homes, the various vinyl and laminated versions can be an excellent and practical choice.

Wooden flooring is under constant technical development; the latest ranges have tough, long-lasting finishes and are straightforward to install. There’s no need to worry about gaps between boards; the click-and-lock systems mean the task can be handled by an experienced DIY-er, although most suppliers will also offer an installation service.

All types of wooden flooring can be laid over practically any sub-floor, including floorboards, concrete, old tiles or a boarded surface, as long as the surface is sound, dry and flat. Reclaimed timber flooring, however, is a slightly different proposition as it won’t be neatly cut to size and it’s also difficult to judge what it will look like once it’s been finished. Take advice from the supplier on how much to buy and which finish choosing, and always ensure that you’ve bought enough – it will be tiresome to track down similar boards elsewhere. It’s also worth experimenting with cleaning and/or finishes on a spare board before installation.

As it is an integral part of the room and colour scheme, you should choose your timber floor at the start of the redecoration or refurbishment project. According to how light or dark the floor is, it can affect how paint and paper colours appear. That’s why it is important to look at a wide selection of Wooden Sample Boards when comparing one product against another.  Sample Boards give you real, actual product to look at, feel and compare.  It’s as good as seeing the final product and that is the purpose of good quality Sample Boards from PrintArt. Although some timber flooring, such as parquet, solid hardwood and reclaimed boards, can be darkened or lightened by sanding down and re-varnishing, it’s not a job you are likely to want to do very often.

Types of Timber Flooring

Solid Wood

Made from the named timbers, these are solid all the way through. Some types are suitable for installation as the structural floor without needing a sub-floor underneath.

Reclaimed Timber

This can be bought as bundles of planks, boards or panels from reclamation and salvage yards, or as whole floors from timber-flooring specialists. Prior to installation, reclaimed timber flooring can look very uninspiring. Once it’s laid, however, it can look incredible.

Multi-Layered or Engineered

A plywood or veneered base, built up with several layers of crisscrossed hard or softwood boards and topped with a layer of the named timber. The construction of this flooring gives it strength and stability, so it’s a good alternative to solid-wood flooring.

Laminate

Made by producing an image of wood on a layer of plastic, which is laminated to a board backing. Top-quality versions have convincing textured finishes and are hardwearing and tough. Inexpensive DIY-store versions may look flat and lifeless, and the “wood” finish may flake or chip at the edges of the boards.

Vinyl

Vinyl flooring is widely available in timber patterns. Luxury sheet vinyl can be a good choice in the kitchen or bathroom and is considerably cheaper than solid wood. Vinyl plank or block flooring feels harder underfoot but, as each floor is individually designed, it always needs to be professionally laid.

Suitability

  • Timber flooring can be noisy, especially in upstairs rooms; use rugs to deaden the sound of footsteps in busy areas, and always use the insulation suggested by the installers.
  • Reclaimed timber flooring is usually well-worn and is tough enough for most living areas, although you should avoid bathrooms and kitchens.
  • Solid or engineered wood flooring is suitable for living rooms, dining rooms, halls and bedrooms.
  • Laminates are suitable for living areas and bedrooms but avoid rooms with water, as seepage between the joins can cause planks to swell or discolour.
  • Vinyl look-alikes are good choices for bathrooms and kitchens, conservatories and utility rooms, as well as for main living areas.

Styles and Grades

Timber flooring comes as planks (also known as boards), each of which can be made up of a number of strips. A plank with a three-strip design has three narrow strips running the length of the plank. The floor will have a random strip pattern when laid. Planks can vary in thickness, each depth being more suitable for certain bases. For example, the thickest planks, at about 22 mm, can be laid over joists as structural floorboards, while thinner planks, at about 7 mm to 15 mm thick are laid as overlay floors on to an existing smooth, dry sub-floor.

The surface finish of timber flooring is also given a grading. Premium or select grades are smooth, uniform and knot-free. Moving down the scale, grades referred to as “natural” or “rustic” are less uniform and, in many cases, more realistic and appealing. Only order your flooring when you have seen a sample of the exact plank – strip, colour, grade and finish.

Wooden Floors and the Environment

Timber flooring is generally acknowledged to be ecologically sound, providing it is produced using timber from sustainable forests. Reputable stores will only deal with manufacturers who use wood from certified sources. In the UK, the Forest Stewardship Council (FSC) scheme is widely recognised and includes a certified chain that tracks timber through every stage, from forest to retailer. For further details, visit fsc-uk.info or call (01686) 413916.

Trends

There’s currently a move away from narrow, pale woods, towards darker wood and reclaimed flooring. Oak is a perennial favourite, possibly due to its middle-range colour options, and the fact that it blends with virtually any colour scheme or style.

Extra-wide boards and planks (up to 76 cm wide in some cases) are becoming favourites too, many with distressed finishes such as “smoked” effects. For laminate flooring, choose designs with V-grooves along the long and short edges of the boards, and with textured surfaces, which look far more realistic than completely smooth surfaces.

Longevity and Upkeep

Solid-hardwood flooring is incredibly hard-wearing and will last for many years. It can be sanded down and resurfaced every five to seven years. Engineered flooring will normally withstand one or two sandings, but no more than that. Real wood flooring will age gracefully, and the signs of wear and tear are an acceptable feature – as timber furniture ages and picks up the occasional dent or mark, so will timber flooring. Laminate flooring cannot be sanded when chipped, damaged or scratched, although the best quality ones are very hardwearing and scratch resistant in the first place.

Save timber floors from getting scratched by grit, dust and dirt by regularly sweeping with a soft brush or vacuuming them. Also, mop the floor once a week or so with a well-wrung mop. A detergent can be added to the water, depending on whether the floor has a hard (varnished or lacquered) or soft (waxed or oiled) finish. Hard finishes provide a protective barrier for the wood, and offer a high level of protection, but are more difficult to repair if damaged.

A serious scratch or dent in a lacquered finish usually means the whole floor has to be sanded back and then relacquered or revarnished. Waxed or oiled finishes are softer, and protect the surface by sinking into the wood itself. They’re most successful if you want to nurture an aged, worn look for your wooden floor. If waxed or oiled woods get damaged, the whole floor will not need to be redone, as it is possible to sand back and re-wax or re-oil an isolated area.

Vinyl wood-look flooring is easy to clean; regular sweeping and mopping are all it needs, and scuff marks can be removed by applying a little white spirit using a soft cloth.

Hopefully, this has shed a little light on the advantages of PrintArt and Wooden Flooring. It can be a fairly complex process but don’t feel overwhelmed, reach out to PrintArt today, and explain your needs.  Their customer service department will put together a cost-effective quote and help your vision come to reality!


PrintArt – Accurate Die Cutting
413 Interchange St.
McKinney, TX 75071
972.562.7921
https://www.printart-adc.com


Would you like more information?
Do you have a special project that you need our help with? Just fill out this small form and let one of our representatives give you a call and talk about your project.

Envelope Printing – Everything You Never Knew You’d Have to Know – Part 1

We set out to write a set of articles called “Frequently Asked Questions About Envelopes,” but we immediately ran into a problem. If the customer doesn’t know anything about envelopes, how will they even know what questions to ask? The world of envelopes can be labyrinthian at times — so we went about it another way.

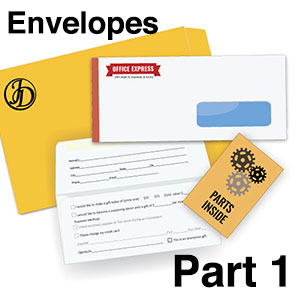
Part 1: All About Envelopes

Outlined here in our first article is the important information you will need to know before ordering printed envelopes, as well as many of the options you may be asked to choose from. If you are newly in charge of ordering envelopes for the boss, and you don’t want to look like a dummy, we can help. Or if you have started your own company, and stationery is the last thing on your mind, we can help with that too.

When you talk to your sales representative she may assume you’re an envelope expert, like herself, and start to rattle off types of envelopes, types of stock, window sizes… Don’t lose hope. Here are a few of the most basic things to know about the envelopes themselves.

What are the Standard Sizes?

#10 – For standard-sized mailings, this is what all those bills you get in the mail are lovingly wrapped in. Fits folded 8.5 x 11 stationery. Check with your post office for bulk mailing discount postage on these! (9.125 x 4.5)

#9 – Also called a “reply” envelope. Fits inside a #10 so the recipient can reply with it (and pay those bills). (8.875 X 3.875)

#7 – Also called a “check” envelope. It’s just big enough to send money!

Remittance Envelopes – For donation requests. Commonly used by churches, charities, and alumni organizations. These come in three common sizes, depending on how much you need to print on them (or how much begging you need to do). These are mailed to the recipient inside a larger envelope, like a #10, and the generous contributors send them back to you, like a reply.

Drive Ups, Teller Helpers, and Bangtails – That last one may sound very funny, but these are all for banks. They have special flaps for holding money and making deposits. Sizes vary depending on your printer. If you work at a bank, hopefully, you know which ones you need!

Coins – The banks use these little guys for coins, but many jewelers, locksmiths, and anyone else who needs to keep track of little stuff, has them printed up.

Key Cards or Credit Cards – The cool little envelopes that hold your hotel key or a gift card.

Florist – Used mostly by florists to accompany arrangements (as the name suggests) these are also a very cute way to present a gift card!

Baronial – These envelopes are shaped like small greeting card envelopes (less long and rectangular than a #10 for instance). These are for announcements or simply when you want a more elegant look (hence the elegant name). They come in various sizes.

Big Envelopes – 6 X 9s, 9 X 12s, 10 X 13s… darn, these don’t have any special funny names (some people call them booklets and catalogs, but we’ll get into that mess later). You can use them for sending documents or printed materials. They are usually offered in all kinds of sturdy stock so they don’t tear when you stuff all your goodies inside.

Custom – Most printers work with large suppliers that can fold custom envelopes. If you’ve created a printed piece that you just can’t stand to see folded, or if your customers have an eye for the unique, chances are your printer can have some special envelopes made.

Now, Where’s That Pesky Flap?

Now that you’ve decided what envelope suits you best, you have to worry about Flap Orientation. This is not an event where your envelope flaps get to know their surroundings, but a name for which end you decide to put the flap on! Most envelopes, like #10s and #9s will always come standard with the long end open, like the kind you use every day. Other envelopes, however, especially the large ones, can be opened on either the long or short dimension. If you’re ordering large envelopes, you will be asked:

“Do you want Open Side or Open End?” or “Do you want Booklet or Catalog?”

Then you will say “What!?” These are two ways of asking the same thing. Here’s what it all means.

Open Side (Booklet) envelopes have the flap on the long end. So if you look at the envelope with the flap at the top, it will be in “landscape” orientation, as your inkjet printer at home would call it.

Open End (Catalog) envelopes have the flap on the short end. So if you look at the envelope with the flap at the top, it will be in “portrait” orientation.

Helpful Hint: Mixing up these definitions can mean a costly do-over on your envelopes, as many printers will have you sign off on manufacturing (or “folding”) your envelopes before you’ve even submitted artwork. It’s helpful to make a little envelope drawing on a post-it and stick it to your computer monitor. Even the pros get confused when they’re looking at specs all day!

More tricky questions: Paper Stock?

The stock is the type of paper your envelopes will be made of. Most common sizes are already “on the floor” (in the printer’s warehouse) in the standard finishes, but if you want something special, you have options.

Wove Paper – This is the standard that most envelopes come in. It’s cheap paper available in many colors, from bright white to canary to sky blue. It does come in a couple of different weights if you need a sturdier envelope, but wove does not offer the highest durability. Don’t ask why it’s not called “woven.” The paper industry just wanted to make up its own word. Besides it’s fun to say “white wove” ten times fast.

Rag Paper and Rag Mixes – Rag is a nicer cotton paper like you would want to use on invitations, announcements, or even basic stationery for a company that has a high-dollar or creative image. You can get mixes of rag and wove to cut costs. Rag offers the best color reproduction and comes in several colors, more natural ones than wove, like grey or oatmeal.

Tyvek – This plastic from the gods is used everywhere from construction sites to the surgery room. Oh yeah, and it makes really durable water-resistant envelopes! Mail your ten-pound product catalog that everyone’s been waiting for, or print a key card holder that still shows your logo after several trips to the hotel pool. Tyvek is recyclable.

Kraft – If you need durability but don’t want to drop the big bucks, kraft paper is the way to go. Many larger envelopes are kraft (or manila) paper, and it comes in some pretty heavyweights.

There are many more stock options (har har) so ask your rep if you have an exotic request.

How Do I Close My Envelopes?

Once you get your envelopes, you’re going to have to put things inside them, right? Well, you need to make sure you can seal your envelopes so your mailings don’t take a detour.

Gum – Standard seal, a gum arabic that needs to be moistened to stick closed.

Peel and Seal -Save a tongue (or a sponge) and use peel and seal envelopes. You rip off the plastic backing to expose a permanent, synthetic gum that seals envelopes tight for their long journey.

Reusable Closures – For interoffice envelopes, driver logs, and more. Order clasps or string and button closures so you can reuse your envelopes ’til they fall apart.

Un-Gummed – Go naked and order un-gummed envelopes! If you are not mailing your envelopes and you don’t want them accidentally sealed (it’s in our nature to want to lick the gum if it’s there…) you can save a buck and forgo the gum. This is common on coin envelopes used for storing small items, and large envelopes intended for reuse.

That just about covers all the choices you may need to make about your envelopes. Now we can get to the fun part: printing your envelopes! Please check out Part 2 of this article.

Hopefully, this has shed a little light on envelopes. It can be a fairly complex process but don’t feel overwhelmed, reach out to PrintArt today, and explain your needs.  Their customer service department will put together a cost-effective quote and help your vision come to reality!


PrintArt – Accurate Die Cutting
413 Interchange St.
McKinney, TX 75071
972.562.7921
https://www.printart-adc.com


Would you like more information?
Do you have a special project that you need our help with? Just fill out this small form and let one of our representatives give you a call and talk about your project.

Brick Sample Boards – The Guide To Buying Bricks

Bricks have been included in the making of buildings since time immemorial. Their use has been perpetuated due to their durability, evidenced by a number of ancient buildings that were made using bricks and have remained standing.

Due to their proven strength, they are used for much more than building houses and offices nowadays. Sidewalks, pavements, fireplaces, and many other construction projects are made using bricks. As a result, there are different types of bricks for different purposes. If you are in the construction business you need to know the differences in order to know how to buy bricks for whatever purpose. Viewing all the brinks that you are interested in on brick sample boards helps you quickly browse the different types of products.  You can use the following mini-guide for buying bricks to help you.

STEP 1 – Find out what types of bricks you need: The two main types of bricks are paving and building bricks. Paving bricks are those that are used to build driveways, patios, the area around a pool, etc. Most brick sample boards will give a description of the material and style. In short, they are the ones that will be placed on the ground and walked/driven on. Building bricks, on the other hand, are used for walls and fences (upstanding structures).

STEP 2 – Determine the number of bricks needed: You will have to first measure the area in order to determine the number of bricks required for your project. A general rule is to use 5 to 7 bricks per square foot depending on whether its for paving or for a wall. The actual amount will vary depending on what the size of the brick used is as well as the pattern and the thickness of each mortar space.

STEP 3 – Source high-quality bricks: Check around local hardware stores that sell bricks to compare costs before making a final choice. When doing so, factor in delivery costs.

STEP 4 – Select the right kind of mortar/grout: Not all mortar mixes are suitable for the type of brick that you plan to use. Confirm the type with the hardware dealer you are buying the bricks from.

STEP 5 – Buy more than enough bricks to cover the project: Having to go back for additional bricks to complete a project or to make minor repairs could mean that the colors do not match even though they are the same bricks.

STEP 6 – Start building: Knowing how to buy bricks will help you get the right kind for the job and be able to get your project off the ground promptly, once the other necessities are in place.

Do you need info onBrick Sample Boardsand how they will revolutionize your process of displaying and selling your bricks to your customers? Reach out to PrintArt today and let their staff work with you every step of the way!


PrintArt – Accurate Die Cutting
413 Interchange St.
McKinney, TX 75071
972.562.7921
https://www.printart-adc.com


Would you like more information?
Do you have a special project that you need our help with? Just fill out this small form and let one of our representatives give you a call and talk about your project.